> ## Documentation Index
> Fetch the complete documentation index at: https://docs.vita.finance/llms.txt
> Use this file to discover all available pages before exploring further.

# How to Provide Liquidity

> Earn fees by providing liquidity with concentrated positions

export const PriceRangeSimulator = () => {
  const [currentPrice, setCurrentPrice] = useState(5.00);
  const [lowerPrice, setLowerPrice] = useState(4.50);
  const [upperPrice, setUpperPrice] = useState(5.50);
  const [liquidityAmount, setLiquidityAmount] = useState(10000);
  const [isCalculating, setIsCalculating] = useState(false);
  const FEE_RATE = 0.003;
  const TICK_SPACING = 60;
  const MIN_TICK = -665454;
  const MAX_TICK = 831818;
  const priceToTick = price => {
    return Math.floor(Math.log(price) / Math.log(1.0001));
  };
  const tickToPrice = tick => {
    return Math.pow(1.0001, tick);
  };
  const calculations = useMemo(() => {
    setIsCalculating(true);
    const lowerTick = priceToTick(lowerPrice);
    const upperTick = priceToTick(upperPrice);
    const currentTick = priceToTick(currentPrice);
    const adjustedLowerTick = Math.floor(lowerTick / TICK_SPACING) * TICK_SPACING;
    const adjustedUpperTick = Math.ceil(upperTick / TICK_SPACING) * TICK_SPACING;
    const fullRangeWidth = MAX_TICK - MIN_TICK;
    const selectedRangeWidth = adjustedUpperTick - adjustedLowerTick;
    const concentration = fullRangeWidth / selectedRangeWidth;
    const inRange = currentTick >= adjustedLowerTick && currentTick <= adjustedUpperTick;
    const sqrtPriceCurrent = Math.sqrt(currentPrice);
    const sqrtPriceLower = Math.sqrt(tickToPrice(adjustedLowerTick));
    const sqrtPriceUpper = Math.sqrt(tickToPrice(adjustedUpperTick));
    let amount0 = 0;
    let amount1 = 0;
    if (currentPrice <= tickToPrice(adjustedLowerTick)) {
      amount0 = liquidityAmount;
      amount1 = 0;
    } else if (currentPrice >= tickToPrice(adjustedUpperTick)) {
      amount0 = 0;
      amount1 = liquidityAmount;
    } else {
      const liquidityRaw = liquidityAmount / currentPrice;
      amount0 = liquidityRaw * (sqrtPriceUpper - sqrtPriceCurrent) / (sqrtPriceUpper - sqrtPriceLower);
      amount1 = liquidityRaw * (sqrtPriceCurrent - sqrtPriceLower);
      const totalValue = amount0 * currentPrice + amount1;
      const ratio = liquidityAmount / totalValue;
      amount0 *= ratio;
      amount1 *= ratio;
    }
    setIsCalculating(false);
    return {
      lowerTick: adjustedLowerTick,
      upperTick: adjustedUpperTick,
      currentTick,
      concentration: concentration.toFixed(2),
      inRange,
      amount0,
      amount1,
      lowerPriceAdjusted: tickToPrice(adjustedLowerTick),
      upperPriceAdjusted: tickToPrice(adjustedUpperTick)
    };
  }, [currentPrice, lowerPrice, upperPrice, liquidityAmount]);
  const formatPrice = price => {
    if (window.VitaUtils?.format?.number) {
      return window.VitaUtils.format.number(price, 4);
    }
    return price.toFixed(4);
  };
  const formatAmount = amount => {
    if (window.VitaUtils?.format?.number) {
      return window.VitaUtils.format.number(amount, 2);
    }
    return amount.toFixed(2);
  };
  return <div className="bg-white dark:bg-gray-800 border border-gray-200 dark:border-gray-700 p-6 rounded-sm">
      <h3 className="text-xl font-bold mb-4 text-gray-900 dark:text-white">Price Range Simulator</h3>
      
      {}
      <div className="grid grid-cols-1 md:grid-cols-2 gap-4 mb-6">
        <div>
          <label htmlFor="current-price" className="block text-sm font-medium mb-2 text-gray-600 dark:text-gray-400">
            Current Price
          </label>
          <input id="current-price" type="number" value={currentPrice} onChange={e => setCurrentPrice(Number(e.target.value))} step="0.01" aria-label="Current Token Price" className="w-full px-3 py-2 rounded-sm bg-gray-50 dark:bg-gray-900 border border-gray-300 dark:border-gray-600 text-gray-900 dark:text-white focus:border-[#fb8f5a] focus:outline-none focus:ring-2 focus:ring-[#fb8f5a]/20" />
        </div>

        <div>
          <label htmlFor="liquidity-amount" className="block text-sm font-medium mb-2 text-gray-600 dark:text-gray-400">
            Total Liquidity Value (USD)
          </label>
          <input id="liquidity-amount" type="number" value={liquidityAmount} onChange={e => setLiquidityAmount(Number(e.target.value))} aria-label="Total Liquidity Value in USD" className="w-full px-3 py-2 rounded-sm bg-gray-50 dark:bg-gray-900 border border-gray-300 dark:border-gray-600 text-gray-900 dark:text-white focus:border-[#fb8f5a] focus:outline-none focus:ring-2 focus:ring-[#fb8f5a]/20" />
        </div>

        <div>
          <label htmlFor="lower-price" className="block text-sm font-medium mb-2 text-gray-600 dark:text-gray-400">
            Lower Price
          </label>
          <input id="lower-price" type="number" value={lowerPrice} onChange={e => setLowerPrice(Number(e.target.value))} step="0.01" aria-label="Lower Price Range" className="w-full px-3 py-2 rounded-sm bg-gray-50 dark:bg-gray-900 border border-gray-300 dark:border-gray-600 text-gray-900 dark:text-white focus:border-[#fb8f5a] focus:outline-none focus:ring-2 focus:ring-[#fb8f5a]/20" />
        </div>

        <div>
          <label htmlFor="upper-price" className="block text-sm font-medium mb-2 text-gray-600 dark:text-gray-400">
            Upper Price
          </label>
          <input id="upper-price" type="number" value={upperPrice} onChange={e => setUpperPrice(Number(e.target.value))} step="0.01" aria-label="Upper Price Range" className="w-full px-3 py-2 rounded-sm bg-gray-50 dark:bg-gray-900 border border-gray-300 dark:border-gray-600 text-gray-900 dark:text-white focus:border-[#fb8f5a] focus:outline-none focus:ring-2 focus:ring-[#fb8f5a]/20" />
        </div>

        <div className="md:col-span-2">
          <div className="bg-blue-500/10 border border-blue-500/30 p-3 rounded-sm" role="status">
            <div className="flex justify-between items-center">
              <span className="text-sm font-medium text-gray-900 dark:text-white">Fixed Fee Rate:</span>
              <span className="font-mono font-bold text-blue-600 dark:text-blue-400">0.30%</span>
            </div>
            <div className="text-xs text-gray-500 dark:text-gray-500 mt-1">
              Tick Spacing: {TICK_SPACING} | All AMM pools use this fee rate
            </div>
          </div>
        </div>
      </div>

      {}
      <div className="mb-6 p-4 bg-white dark:bg-gray-800 border border-gray-200 dark:border-gray-700 rounded-sm">
        <h4 className="text-lg font-semibold mb-3 text-gray-900 dark:text-white">Price Range Visualization</h4>
        <div className="relative h-16 bg-gray-100 dark:bg-gray-900 rounded-sm" role="img" aria-label="Price range visualization">
          {}
          <div className="absolute top-0 h-full w-0.5 bg-blue-500" style={{
    left: `${(currentPrice - lowerPrice) / (upperPrice - lowerPrice) * 100}%`
  }} aria-label={`Current price at ${formatPrice(currentPrice)}`}>
            <span className="absolute -top-6 -left-12 text-xs bg-blue-500 text-white px-2 py-1 rounded-sm">
              Current: ${formatPrice(currentPrice)}
            </span>
          </div>
          
          {}
          <div className="absolute top-0 left-0 h-full flex items-center px-2 text-xs text-gray-600 dark:text-gray-400">
            ${formatPrice(calculations.lowerPriceAdjusted)}
          </div>
          <div className="absolute top-0 right-0 h-full flex items-center px-2 text-xs text-gray-600 dark:text-gray-400">
            ${formatPrice(calculations.upperPriceAdjusted)}
          </div>
          
          {}
          <div className={`absolute inset-0 ${calculations.inRange ? 'bg-green-500' : 'bg-red-500'} opacity-20 rounded-sm`}></div>
        </div>
        
        <div className={`mt-2 text-center text-sm font-medium ${calculations.inRange ? 'text-green-600 dark:text-green-400' : 'text-red-600 dark:text-red-400'}`} role="status" aria-live="polite">
          {calculations.inRange ? '✓ Price is IN RANGE' : '✗ Price is OUT OF RANGE'}
        </div>
      </div>

      {}
      <div className="space-y-4" role="region" aria-label="Calculation Results">
        <div className="bg-white dark:bg-gray-800 border border-gray-200 dark:border-gray-700 p-4 rounded-sm">
          <h4 className="text-lg font-semibold mb-3 text-gray-900 dark:text-white">Range Details</h4>
          <div className="grid grid-cols-2 gap-4 text-sm">
            <div>
              <span className="text-gray-600 dark:text-gray-400">Lower Tick:</span>
              <span className="ml-2 font-mono text-gray-900 dark:text-white">{isCalculating ? '...' : calculations.lowerTick}</span>
            </div>
            <div>
              <span className="text-gray-600 dark:text-gray-400">Upper Tick:</span>
              <span className="ml-2 font-mono text-gray-900 dark:text-white">{isCalculating ? '...' : calculations.upperTick}</span>
            </div>
            <div className="col-span-2">
              <span className="text-gray-600 dark:text-gray-400">Capital Efficiency:</span>
              <span className="ml-2 font-mono font-bold text-green-600 dark:text-green-400">
                {isCalculating ? '...' : calculations.concentration}x
              </span>
              <span className="text-xs text-gray-500 dark:text-gray-500 ml-2">vs full range</span>
            </div>
          </div>
        </div>

        <div className="bg-white dark:bg-gray-800 border border-gray-200 dark:border-gray-700 p-4 rounded-sm">
          <h4 className="text-lg font-semibold mb-3 text-gray-900 dark:text-white">Required Token Amounts</h4>
          <div className="space-y-2">
            <div className="flex justify-between text-gray-700 dark:text-gray-300">
              <span>Token 0 (e.g., NEAR):</span>
              <span className="font-mono font-bold">{isCalculating ? '...' : formatAmount(calculations.amount0)}</span>
            </div>
            <div className="flex justify-between text-gray-700 dark:text-gray-300">
              <span>Token 1 (e.g., USDC):</span>
              <span className="font-mono font-bold">${isCalculating ? '...' : formatAmount(calculations.amount1)}</span>
            </div>
            <div className="pt-2 border-t border-gray-200 dark:border-gray-700">
              <div className="flex justify-between text-sm text-gray-600 dark:text-gray-400">
                <span>Total Value:</span>
                <span className="font-mono">${liquidityAmount}</span>
              </div>
            </div>
          </div>
        </div>

        <div className="text-xs text-gray-500 dark:text-gray-500">
          <p>* All positions use 0.30% fee rate with tick spacing of {TICK_SPACING}</p>
          <p>* tick = floor(log(price) / log(1.0001))</p>
          <p>* Capital efficiency shows how concentrated your liquidity is compared to full range (infinite) provision</p>
        </div>
      </div>
    </div>;
};

## Prerequisites

<Warning>
  Before providing liquidity, ensure you have:

  * A NEAR-compatible wallet connected (23 wallet options available)
  * Both tokens of the pair you want to provide (e.g., NEAR and USDC)
  * Small amount of NEAR for gas fees (\~0.1 NEAR)
  * Understanding of [concentrated liquidity](/concepts/concentrated-liquidity) and impermanent loss risks
</Warning>

## Become a Liquidity Provider

Earn trading fees by providing liquidity to Vita pools. With concentrated liquidity, you can earn significantly higher fees compared to traditional AMMs.

<Info>
  **New to DeFi?** Providing liquidity means depositing tokens into a pool where traders can swap. You earn a portion of the trading fees (default 0.3% on all trades).
</Info>

## The 3-Step Process

<Steps>
  <Step title="Select your token pair">
    Choose from existing pools or create a new one
  </Step>

  <Step title="Set your price range">
    Narrow ranges earn more fees but require more management
  </Step>

  <Step title="Deposit tokens and mint NFT">
    Your position becomes an NFT you can manage, boost, or farm
  </Step>
</Steps>

## Step 1: Select Your Token Pair

### Browse Available Pools

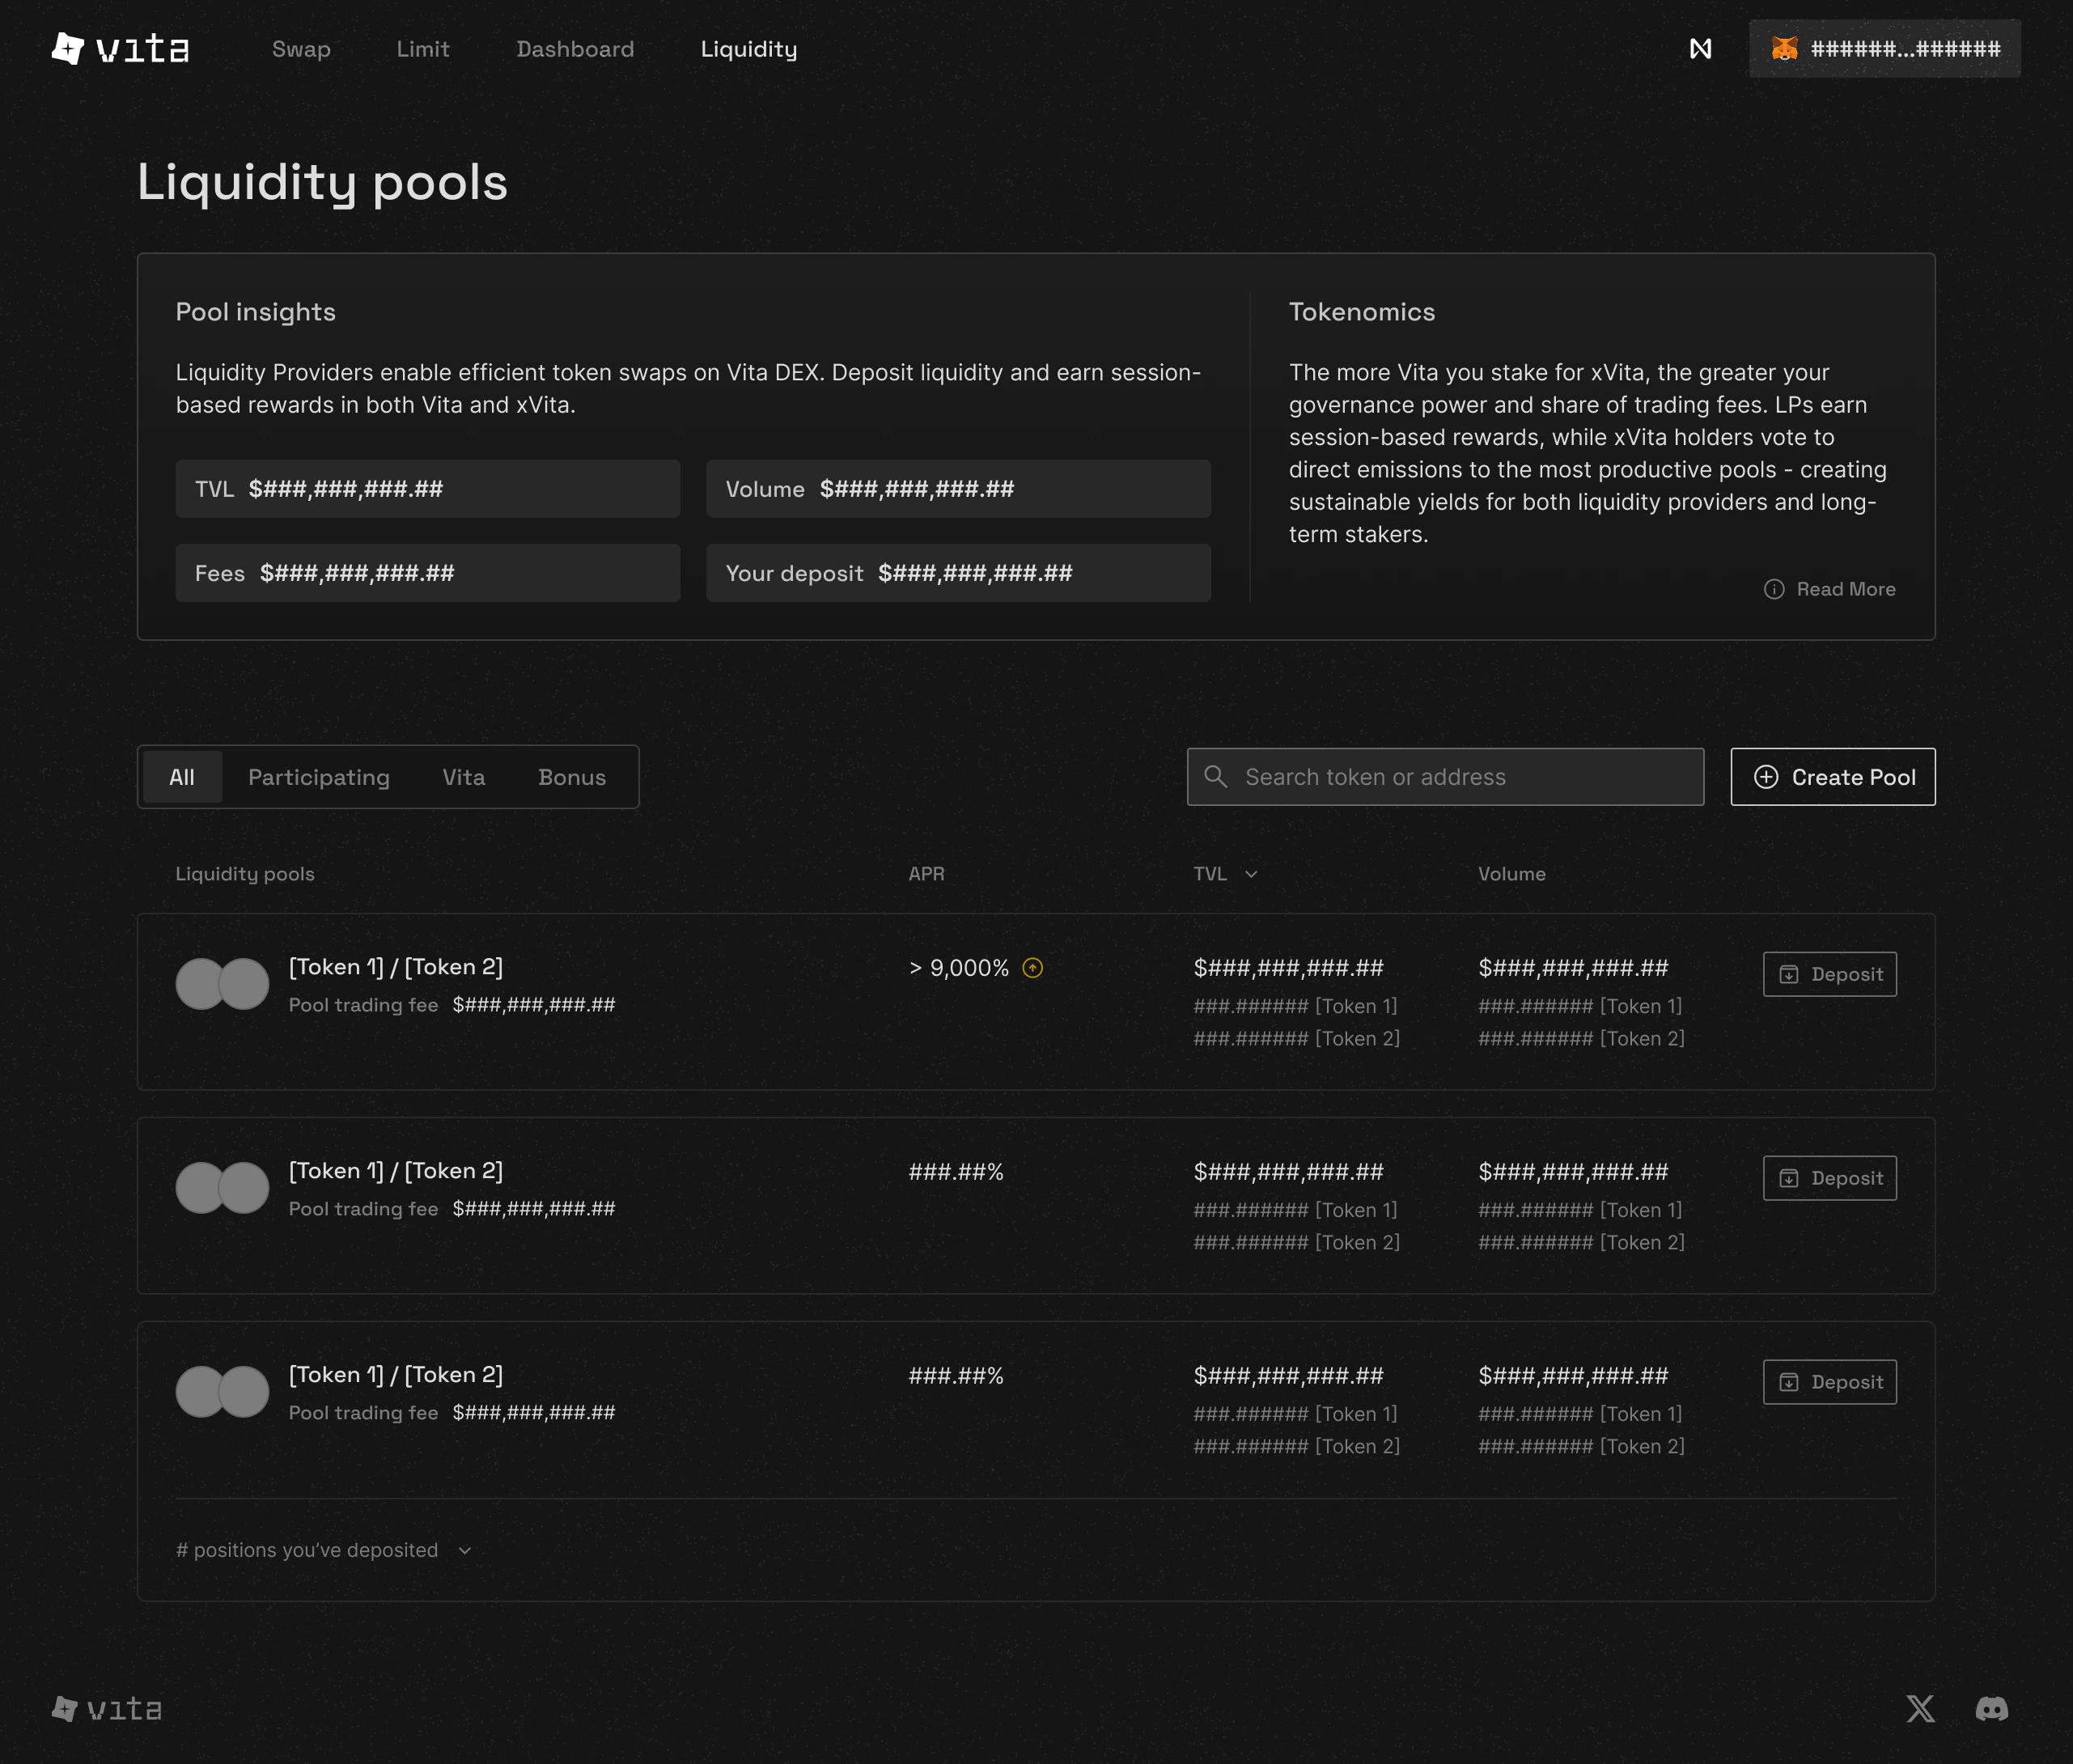
<Frame caption="Navigate to the Liquidity page to see all available pools">
  <img className="block dark:hidden" src="https://mintcdn.com/vita-29cb4832/0BX7ec2JKnkM5V86/images/screenshots/liquidity-hero.png?fit=max&auto=format&n=0BX7ec2JKnkM5V86&q=85&s=289e0d8bc11caaf703bba7690c920ddb" alt="Liquidity pools overview page" width="2562" height="2180" data-path="images/screenshots/liquidity-hero.png" />

  <img className="hidden dark:block" src="https://mintcdn.com/vita-29cb4832/0BX7ec2JKnkM5V86/images/screenshots/liquidity-hero.png?fit=max&auto=format&n=0BX7ec2JKnkM5V86&q=85&s=289e0d8bc11caaf703bba7690c920ddb" alt="Liquidity pools overview page" width="2562" height="2180" data-path="images/screenshots/liquidity-hero.png" />
</Frame>

Navigate to the Liquidity page to see all available pools with key metrics like TVL, volume, and your deposited positions.

### Choosing the Right Pair
<Tabs>
  <Tab title="Popular Pairs">
    <CardGroup cols={2}>
      <Card title="NEAR / USDC">
        High volume pair
      </Card>

      <Card title="VITA / NEAR">
        Native protocol pair
      </Card>
    </CardGroup>
  </Tab>

  <Tab title="Stable Pairs">
    Best for beginners - minimal impermanent loss:

    **USDC / USDT**\
    Stable value, tight ranges work best

    **USDC / DAI**\
    Very stable, perfect for conservative strategies

    **wBTC / BTC.b**\
    Stable BTC pairs across bridges

    <Note>
      All pairs have a default 0.3% trading fee.
    </Note>
  </Tab>

  <Tab title="Your Holdings">
    <Note>
      We'll show pairs based on tokens in your wallet. Connect your wallet to see personalized recommendations.
    </Note>
  </Tab>
</Tabs>

### Understanding Your Options

<AccordionGroup>
  <Accordion title="What makes a good pair?" icon="circle-question">
    Consider these factors:

    * **Trading Volume:** Higher volume = more fees
    * **Volatility:** Stable pairs = less impermanent loss
    * **Your Holdings:** Use tokens you already own
    * **Correlation:** Similarly moving tokens work well together
  </Accordion>

  <Accordion title="New pool creation" icon="plus">
    Can't find your desired pair? Create a new pool:

    * Set initial price
    * Default 0.3% fee applies
    * Be the first LP!
  </Accordion>
</AccordionGroup>

## Step 2: Set Your Price Range

### Pool Detail View

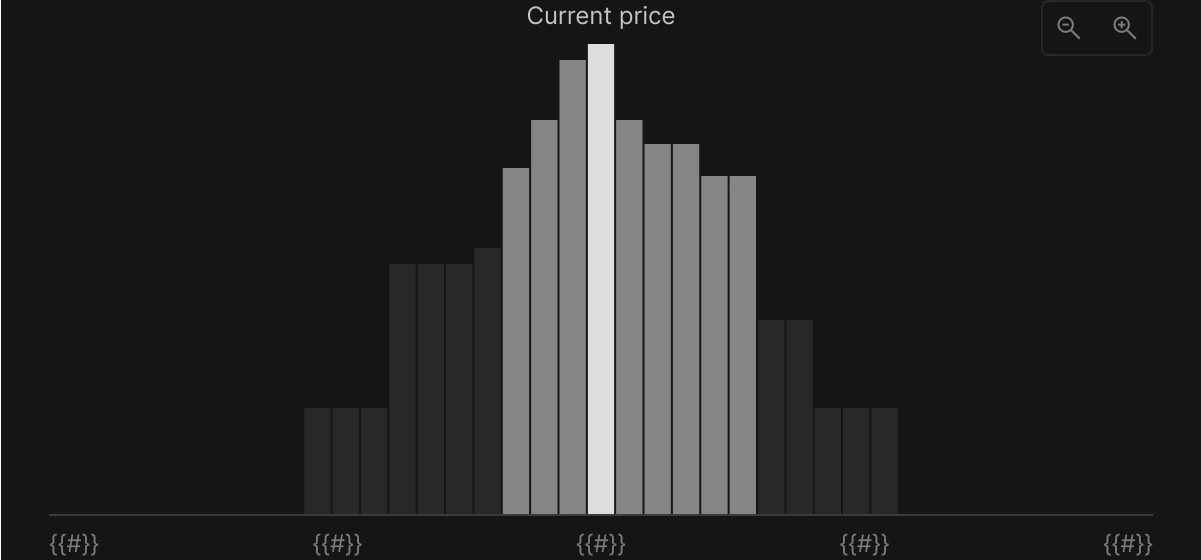
<Frame caption="The pool detail page shows current price and liquidity distribution">
  <img className="block dark:hidden" src="https://mintcdn.com/vita-29cb4832/0BX7ec2JKnkM5V86/images/screenshots/range-chart.png?fit=max&auto=format&n=0BX7ec2JKnkM5V86&q=85&s=65c5a24ab02177a58049a502d8688b93" alt="Pool detail with price range selection" width="1201" height="560" data-path="images/screenshots/range-chart.png" />

  <img className="hidden dark:block" src="https://mintcdn.com/vita-29cb4832/0BX7ec2JKnkM5V86/images/screenshots/range-chart.png?fit=max&auto=format&n=0BX7ec2JKnkM5V86&q=85&s=65c5a24ab02177a58049a502d8688b93" alt="Pool detail with price range selection" width="1201" height="560" data-path="images/screenshots/range-chart.png" />
</Frame>

The pool detail page shows current price, liquidity distribution, and preset range options to help you choose.

### Understanding Fee Distribution

All pools charge a default **0.3% trading fee** on every swap. The fees are distributed through protocol\_fee\_rate and community\_fee\_rate configurations.

**Fee distribution:**

* Liquidity providers earn the majority of fees
* Protocol and community vaults receive configured portions
* xVITA stakers benefit from protocol revenue

### Setting Your Price Range
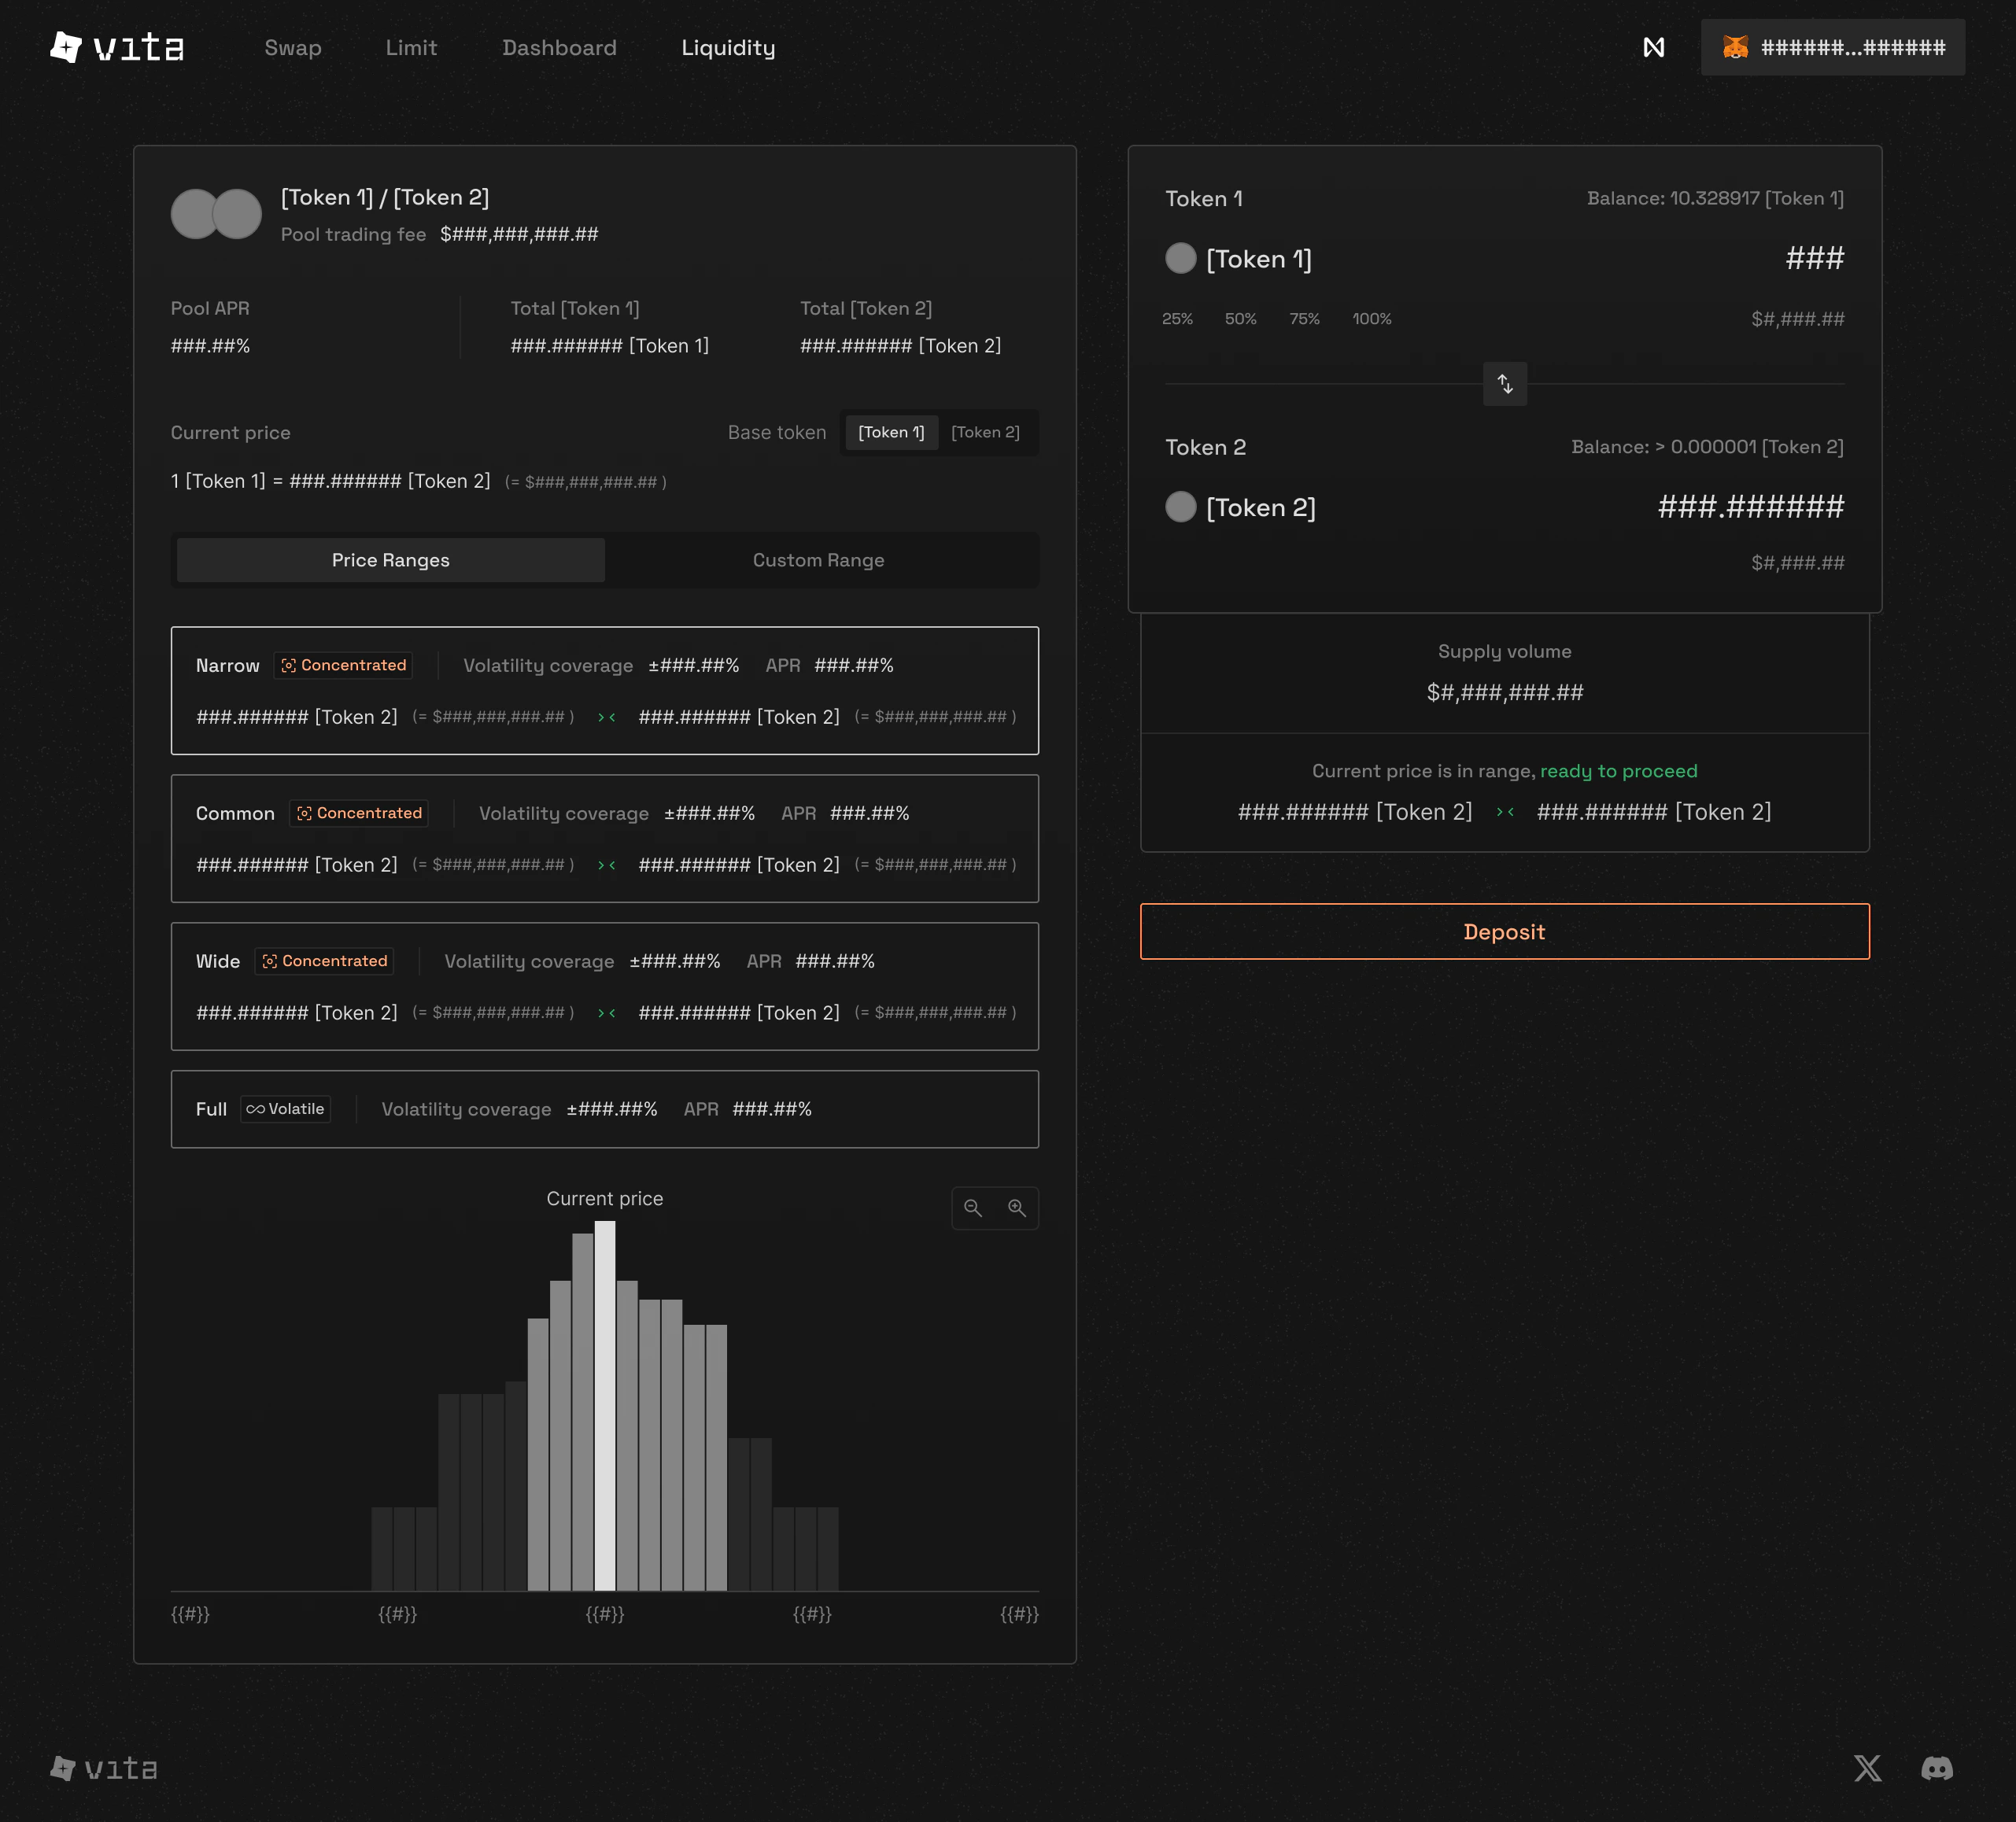
<Tabs>
  <Tab title="Preset Ranges">
    <CardGroup>
      <Card title="Full Range">
        **MIN\_TICK (-665454) to MAX\_TICK (831818)**\
        Efficiency: \~1x\
        Never goes out of range
      </Card>

      <Card title="Wide Range">
        **±50% from current price**\
        Efficiency: Higher\
        Good for beginners
      </Card>

      <Card title="Narrow Range">
        **±10% from current price** (RECOMMENDED)\
        Efficiency: Much higher\
        Higher returns
      </Card>
    </CardGroup>
  </Tab>

  <Tab title="Custom Range">
    **Set Custom Price Range**

    <Note>
      Price = 1.0001^tick\
      Valid tick range: -665454 to 831818
    </Note>
  </Tab>
</Tabs>

## Step 3: Deposit Tokens

### Calculate Your Deposit

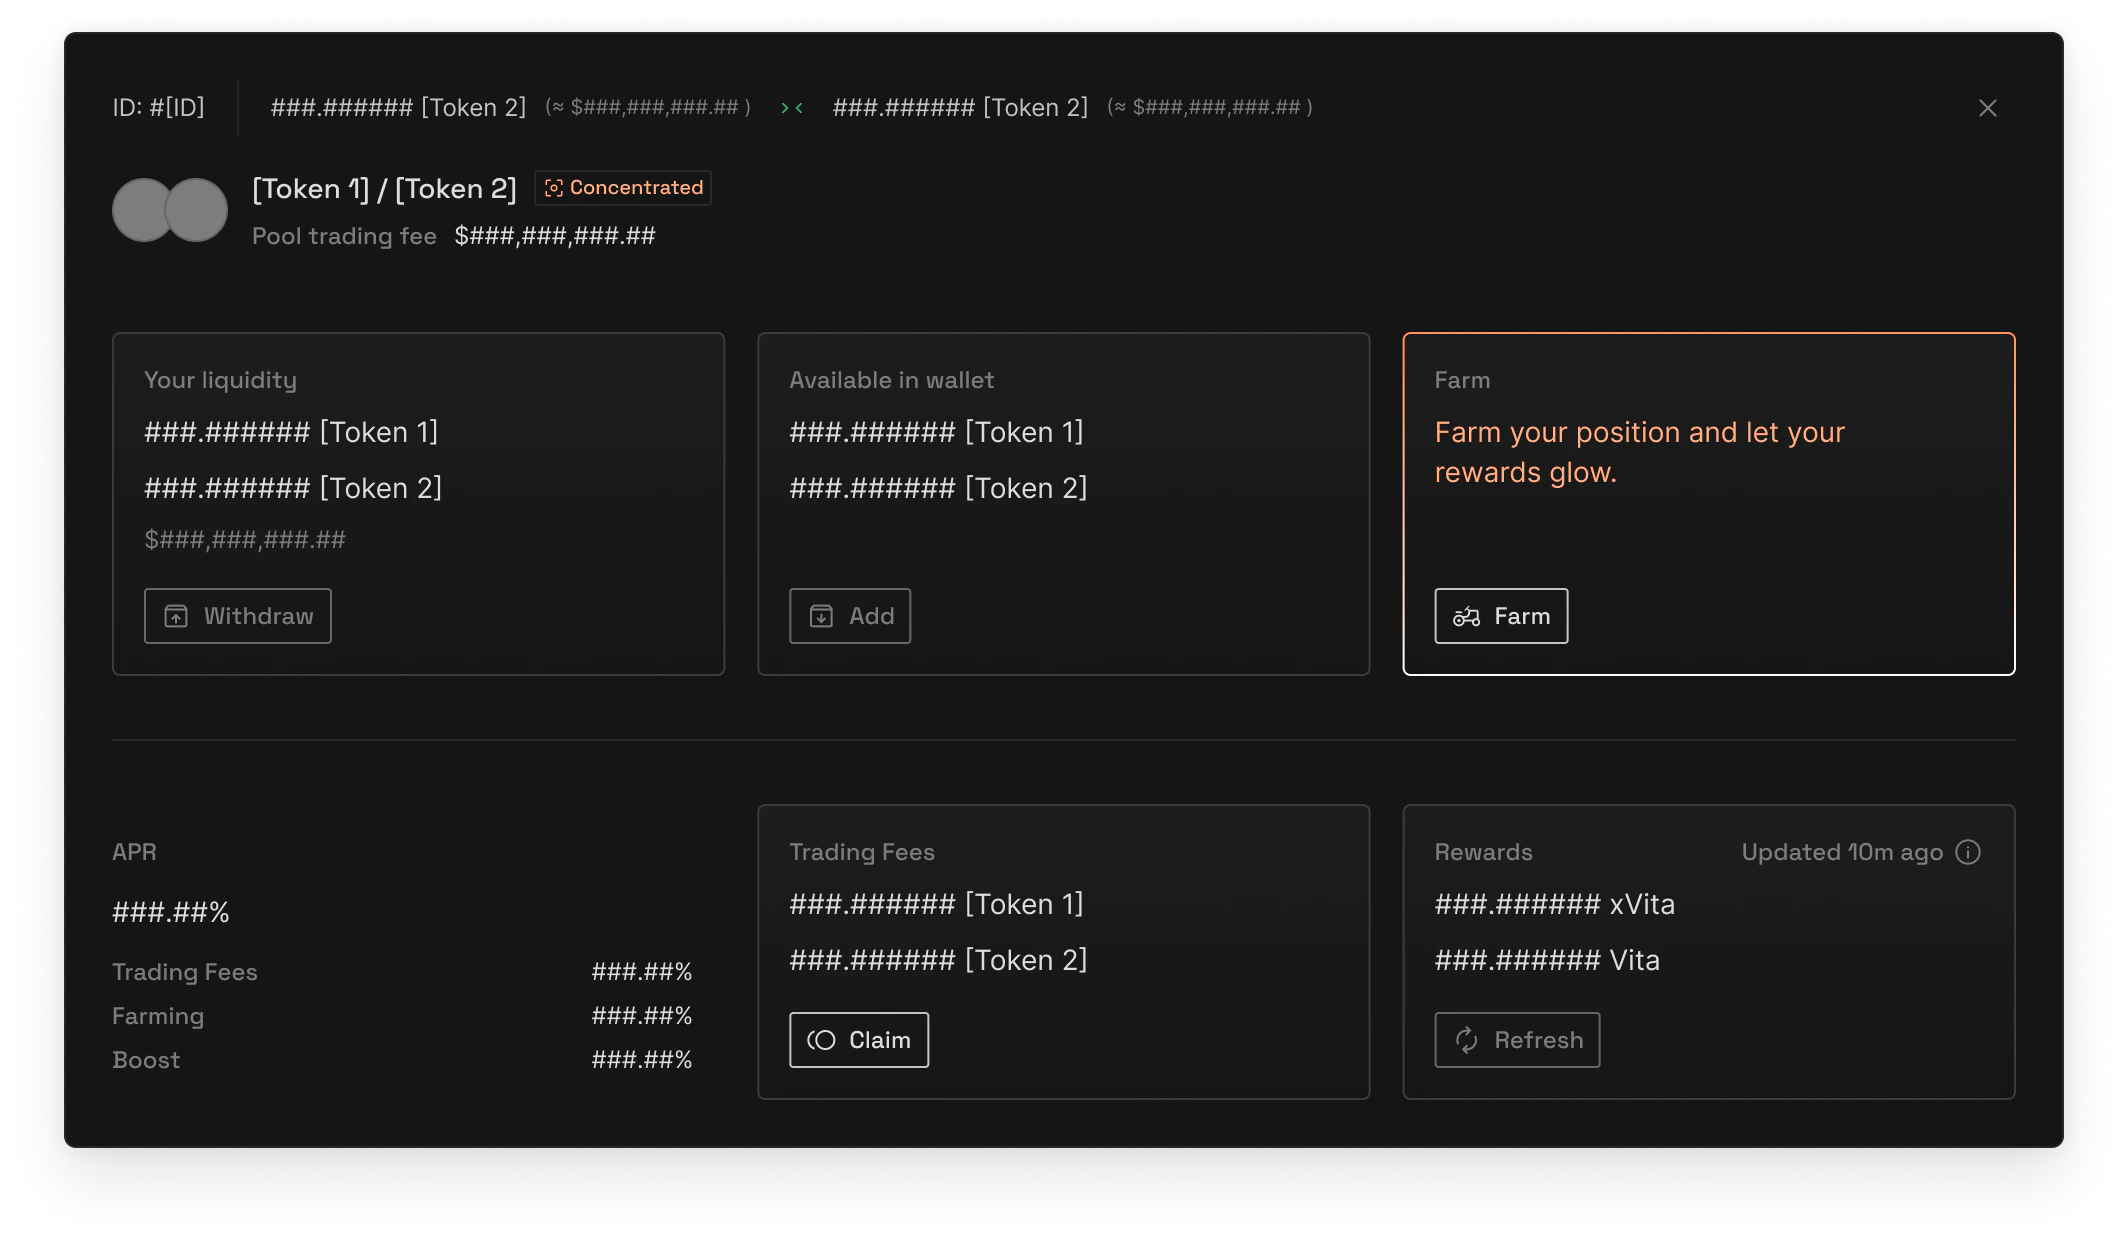
<Frame caption="The interface automatically calculates the optimal ratio">
  <img className="block dark:hidden" src="https://mintcdn.com/vita-29cb4832/0BX7ec2JKnkM5V86/images/screenshots/liquidity-step3.png?fit=max&auto=format&n=0BX7ec2JKnkM5V86&q=85&s=5da6e12d454e3a69cf561617ecf2c7c1" alt="Pool deposit with calculated amounts" width="2562" height="2316" data-path="images/screenshots/liquidity-step3.png" />

  <img className="hidden dark:block" src="https://mintcdn.com/vita-29cb4832/0BX7ec2JKnkM5V86/images/screenshots/liquidity-step3.png?fit=max&auto=format&n=0BX7ec2JKnkM5V86&q=85&s=5da6e12d454e3a69cf561617ecf2c7c1" alt="Pool deposit with calculated amounts" width="2562" height="2316" data-path="images/screenshots/liquidity-step3.png" />
</Frame>

The ratio of tokens you need to deposit depends on:

* Current price
* Your selected range
* Which token is worth more

The interface automatically calculates the optimal ratio.

### Final Confirmation
<Steps>
  <Step title="Review Details">
    Double-check:

    * Token amounts
    * Price range (tick\_lower and tick\_upper)
    * Default 0.3% fee
    * Minimum amounts (amount0\_min, amount1\_min)
  </Step>

  <Step title="Approve Tokens">
    First-time only: Approve the contract to use your tokens
  </Step>

  <Step title="Mint Position">
    Confirm the transaction to mint your position NFT
  </Step>

  <Step title="Receive NFT">
    Your position is now an NFT in your wallet!
  </Step>
</Steps>

## Managing Your Position

Once created, you can manage your position through the detailed interface:

<Frame caption="Complete position management interface">
  <img className="block dark:hidden" src="https://mintcdn.com/vita-29cb4832/0BX7ec2JKnkM5V86/images/screenshots/position-management.png?fit=max&auto=format&n=0BX7ec2JKnkM5V86&q=85&s=d5cd48c378321ab0218a64fbe682b1fa" alt="Position management interface" width="2128" height="1244" data-path="images/screenshots/position-management.png" />

  <img className="hidden dark:block" src="https://mintcdn.com/vita-29cb4832/0BX7ec2JKnkM5V86/images/screenshots/position-management.png?fit=max&auto=format&n=0BX7ec2JKnkM5V86&q=85&s=d5cd48c378321ab0218a64fbe682b1fa" alt="Position management interface" width="2128" height="1244" data-path="images/screenshots/position-management.png" />
</Frame>

### Available Actions

<CardGroup cols={2}>
  <Card title="Increase Liquidity" icon="plus">
    Add more tokens to earn more fees
  </Card>

  <Card title="Decrease Liquidity" icon="minus">
    Remove some or all tokens
  </Card>

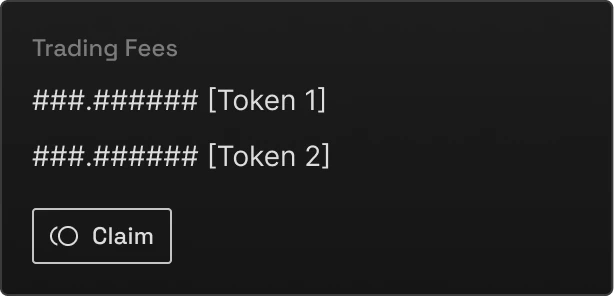
  <Card title="Collect Fees" icon="coins">
    Claim earned trading fees anytime

    <Frame>
      <img className="block dark:hidden" src="https://mintcdn.com/vita-29cb4832/0BX7ec2JKnkM5V86/images/screenshots/position-card-fees.png?fit=max&auto=format&n=0BX7ec2JKnkM5V86&q=85&s=a08c3717d012b2a3643dc3780d7f2625" alt="Trading fees claim interface" width="614" height="296" data-path="images/screenshots/position-card-fees.png" />

      <img className="hidden dark:block" src="https://mintcdn.com/vita-29cb4832/0BX7ec2JKnkM5V86/images/screenshots/position-card-fees.png?fit=max&auto=format&n=0BX7ec2JKnkM5V86&q=85&s=a08c3717d012b2a3643dc3780d7f2625" alt="Trading fees claim interface" width="614" height="296" data-path="images/screenshots/position-card-fees.png" />
    </Frame>
  </Card>

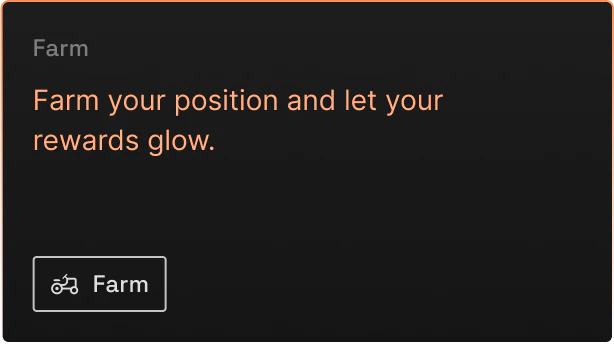
  <Card title="Start Farming" icon="seedling">
    Stake your NFT for bonus rewards with boost mechanics

    <Frame>
      <img className="block dark:hidden" src="https://mintcdn.com/vita-29cb4832/0BX7ec2JKnkM5V86/images/screenshots/position-card-farm.png?fit=max&auto=format&n=0BX7ec2JKnkM5V86&q=85&s=81c3202724848346b916f91dc584368f" alt="Farm position interface" width="614" height="344" data-path="images/screenshots/position-card-farm.png" />

      <img className="hidden dark:block" src="https://mintcdn.com/vita-29cb4832/0BX7ec2JKnkM5V86/images/screenshots/position-card-farm.png?fit=max&auto=format&n=0BX7ec2JKnkM5V86&q=85&s=81c3202724848346b916f91dc584368f" alt="Farm position interface" width="614" height="344" data-path="images/screenshots/position-card-farm.png" />
    </Frame>
  </Card>
</CardGroup>

### Boost Your Position

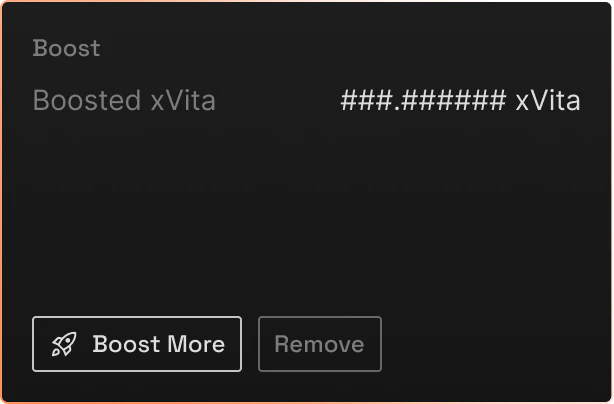
<Frame caption="Apply xVITA boost to maximize your farming rewards">
  <img className="block dark:hidden" src="https://mintcdn.com/vita-29cb4832/0BX7ec2JKnkM5V86/images/screenshots/position-card-boost.png?fit=max&auto=format&n=0BX7ec2JKnkM5V86&q=85&s=c3f1808cdaf10ab50df18aba63df03bb" alt="Boost position interface" width="614" height="404" data-path="images/screenshots/position-card-boost.png" />

  <img className="hidden dark:block" src="https://mintcdn.com/vita-29cb4832/0BX7ec2JKnkM5V86/images/screenshots/position-card-boost.png?fit=max&auto=format&n=0BX7ec2JKnkM5V86&q=85&s=c3f1808cdaf10ab50df18aba63df03bb" alt="Boost position interface" width="614" height="404" data-path="images/screenshots/position-card-boost.png" />
</Frame>

Apply xVITA boost to maximize your farming rewards (up to 2.5x multiplier).

### Monitor Rewards
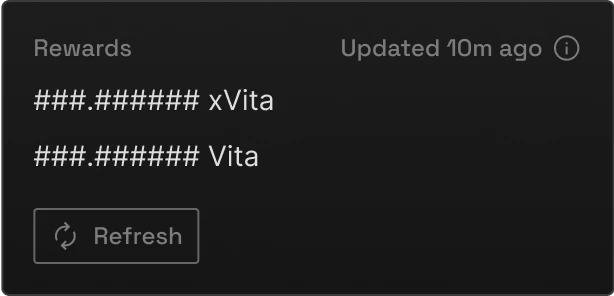
<Frame caption="Track your accumulated rewards in real-time">
  <img className="block dark:hidden" src="https://mintcdn.com/vita-29cb4832/0BX7ec2JKnkM5V86/images/screenshots/position-card-rewards.png?fit=max&auto=format&n=0BX7ec2JKnkM5V86&q=85&s=ef88d9251427a5bb97d5fbd1cbf4c61d" alt="Position rewards interface" width="614" height="296" data-path="images/screenshots/position-card-rewards.png" />

  <img className="hidden dark:block" src="https://mintcdn.com/vita-29cb4832/0BX7ec2JKnkM5V86/images/screenshots/position-card-rewards.png?fit=max&auto=format&n=0BX7ec2JKnkM5V86&q=85&s=ef88d9251427a5bb97d5fbd1cbf4c61d" alt="Position rewards interface" width="614" height="296" data-path="images/screenshots/position-card-rewards.png" />
</Frame>

Track your accumulated xVITA and VITA rewards, updated every 10 minutes.

## Common Strategies

<AccordionGroup>
  <Accordion title="Wide Range (Beginners)" icon="shield">
    **Best for: New LPs, volatile markets**

    * Set range ±20-50% from current price
    * Lower returns but safer
    * Requires less monitoring
    * Good for learning

    **Example: NEAR at \$5**

    * Min: \$2.50 (-50%)
    * Max: \$7.50 (+50%)
  </Accordion>

  <Accordion title="Narrow Range (Advanced)" icon="target">
    **Best for: Stable pairs, active management**

    * Set range ±1-10% from current price
    * Higher returns but riskier
    * Requires frequent adjustments
    * Maximum fee generation

    **Example: USDC/USDT at 1.00**

    * Min: 0.995 (-0.5%)
    * Max: 1.005 (+0.5%)
  </Accordion>

  <Accordion title="Range Orders (Pro)" icon="chart-line">
    **Best for: Taking profits, buying dips**

    Use single-sided liquidity as limit orders:

    * Above market: 100% token A (sell order)
    * Below market: 100% token B (buy order)

    **Example: Sell NEAR at \$6**

    * Min: \$6.00
    * Max: \$6.10
    * Deposit: 100% NEAR
  </Accordion>
</AccordionGroup>

## Risk Management

<Tabs>
  <Tab title="Impermanent Loss">
    **Understanding IL Risk**

    Concentrated positions can experience higher IL:

    | Scenario                      | Impact                |
    | ----------------------------- | --------------------- |
    | Price stays in range          | Normal IL + High fees |
    | Price exits range temporarily | Some IL + No fees     |
    | Price exits range permanently | Max IL + No fees      |
  </Tab>

  <Tab title="Gas Optimization">
    Tips to save on gas:

    * Add liquidity during low network usage
    * Collect fees when amounts are significant
    * Batch operations when possible
    * Use wider ranges if not actively managing
  </Tab>

  <Tab title="Position Sizing">
    <Note>
      Never provide more liquidity than you're comfortable potentially losing. Start small and learn the mechanics before scaling up.
    </Note>

    **Recommended allocation:**

    | Experience   | Portfolio %                      |
    | ------------ | -------------------------------- |
    | Beginners    | 5-10%                            |
    | Intermediate | 10-25%                           |
    | Advanced     | Up to 50% with active management |
  </Tab>
</Tabs>

## Code Examples

<Warning>
  The following code examples are for illustration purposes. Always verify contract addresses and test thoroughly before using in production.
</Warning>

<CodeGroup>
  ```javascript Near-API-JS theme={null}
  // Direct contract interaction (no SDK available)
  const { connect, Contract, keyStores } = require("near-api-js");

  // Mint a new position
  const contract = new Contract(
    account,
    "[TBD]", // Contract address TBD
    {
      changeMethods: ["mint_position"],
    }
  );

  // Note: VITA uses 18 decimals, not 24
  await contract.mint_position({
    pool_id: "NEAR-USDC",
    tick_lower_index: -69300, // Example tick
    tick_upper_index: -46050, // Example tick
    amount0_desired: "1000000000000000000000000", // 1 NEAR (24 decimals)
    amount1_desired: "5000000", // 5 USDC (6 decimals)
    amount0_min: "990000000000000000000000", // 0.99 NEAR (1% slippage)
    amount1_min: "4950000" // 4.95 USDC (1% slippage)
  });
  ```

  ```bash NEAR-CLI theme={null}
  # Mint position using NEAR CLI
  near call [TBD] mint_position \
    '{
      "pool_id": "NEAR-USDC",
      "tick_lower_index": -69300,
      "tick_upper_index": -46050,
      "amount0_desired": "1000000000000000000000000",
      "amount1_desired": "5000000",
      "amount0_min": "990000000000000000000000",
      "amount1_min": "4950000"
    }' \
    --accountId your-wallet.near \
    --amount 0.1
  ```
</CodeGroup>

## Interactive Calculators

### Calculate Your Position

<Card title="Price Range Simulator">
  <PriceRangeSimulator />
</Card>

## Next Steps

<CardGroup cols={3}>
  <Card title="Staking Guide" icon="eye" href="/concepts/xvita-staking">
    Monitor your active positions
  </Card>

  <Card title="Learn Strategies" icon="chess" href="/guides/advanced/liquidity-strategies">
    Advanced LP techniques
  </Card>

  <Card title="Join Community" icon="users" href="https://discord.gg/vitafinance">
    Get help from other LPs
  </Card>
</CardGroup>